Gathering Your Gear: Essentials for a Smooth Online Radio Setup
Before you press “Go Live,” the foundation of any reliable online radio setup starts with the right hardware. A sturdy desktop or laptop with a modern multi‑core processor gives you the headroom to run the encoder, automation software, and any plug‑ins without hiccups.
Pair that computer with a dedicated audio interface – think Focusrite Scarlett or PreSonus Studio – to convert analog signals to clean digital streams. The interface provides phantom power, low‑latency monitoring, and crisp 24‑bit/48 kHz conversion, which is essential for broadcast‑grade sound.
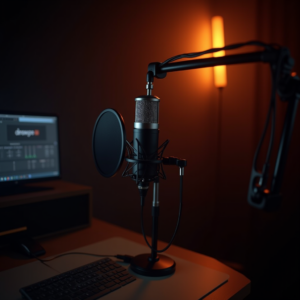
When it comes to microphones, the choice between dynamic and condenser hinges on your environment. A dynamic mic like the Shure SM58 thrives in noisy rooms because it rejects background chatter. A condenser, such as the Audio‑Technica AT2020, captures subtle nuances but needs a treated space to avoid picking up room tone.
Headphones are your final piece of the puzzle. Closed‑back, flat‑response models let you hear exactly what your listeners will hear, helping you spot distortion before it reaches the airwaves.
A reliable internet connection is non‑negotiable. Aim for at least 5 Mbps upload speed for a 128 kbps stream, and consider a wired Ethernet link to avoid Wi‑Fi jitter.
- Community talk
- Music DJ
- Podcast syndication
- Live events
Share your answer in the comments!

Installing LoovaCast Encoder: Step‑by‑Step Installation
First, head to the LoovaCast website and download the encoder package that matches your operating system – Windows, macOS, or Linux. The installer is lightweight, typically under 30 MB, so it won’t hog your bandwidth.
Run the installer and follow the wizard. Accept the license agreement, choose the default install folder (we recommend leaving it untouched), and let the process finish. The installer will automatically add the encoder to your system’s PATH, making it easy to launch from a shortcut.
Once installed, open the LoovaCast Encoder application. You’ll be greeted by a clean login screen; enter the email and password you use for your LoovaCast account. If you don’t have an account yet, the sign‑up flow takes just a minute and guides you through creating a station name and choosing a streaming plan.
After logging in, the encoder will sync with your account and pull in your station’s streaming key. This key is what ties your local broadcast to LoovaCast’s cloud distribution network, ensuring listeners can tune in from anywhere.
Take a moment to explore the dashboard. The main window shows real‑time CPU usage, bitrate, and a quick “Start Stream” button. At this point, your encoder is ready for the next phase: fine‑tuning audio quality.

Configuring Audio Settings for Broadcast‑Quality Sound
Bitrate is the first lever you’ll adjust. For most music stations, 128 kbps offers a solid balance between quality and listener data usage, while 256 kbps gives audiophiles a richer experience. If your audience primarily tunes in via mobile data, stay closer to 128 kbps to avoid buffering.
Set the sample rate to 44.1 kHz – the CD standard – which aligns with most music files and keeps the encoder efficient. Enabling Variable Bitrate (VBR) lets the encoder allocate more bits to complex passages and fewer to silence, preserving fidelity without inflating bandwidth.
Gain control is another critical setting. Use the encoder’s built‑in gain knob to bring your average levels to around –12 dBFS. This headroom prevents clipping when a listener shouts into the mic or a sudden drum hit hits the mix.
Loudness normalization ensures every track sounds at a consistent level. Turn on the “EBU R128” mode, and the encoder will automatically adjust perceived loudness to –23 LUFS, which matches modern broadcast standards and reduces listener fatigue.
Integrating Radio Automation and Playlist Management
Automation is the glue that holds an online radio setup together when you can’t be at the mic 24/7. LoovaCast plays nicely with popular tools like SAM Broadcaster, RadioDJ, and even open‑source options such as Airtime.
Start by installing your chosen automation software and linking it to LoovaCast via the streaming key you retrieved earlier. In the automation client, create a new “Station Profile” and paste the key into the output settings. Test the connection – you should see a green “Live” indicator within seconds.
Next, import your music library. Tag each track with proper metadata (artist, genre, BPM) so the scheduler can apply rotation rules. Set up a basic rotation: 60 % music, 30 % talk, 10 % jingles. This keeps the flow engaging without overwhelming listeners with one type of content.
Don’t forget voice‑over spots. Record short station IDs and promos, then drop them into the automation queue to play at the top of each hour. This reinforces branding and gives your audience a sense of continuity.
Finally, enable fail‑over streaming. LoovaCast offers a secondary ingest URL; configure your automation client to switch automatically if the primary server drops. This redundancy is a lifesaver during ISP outages or hardware hiccups.

Testing, Monitoring, and Fine‑Tuning Your Stream
A solid online radio setup isn’t complete until you’ve run a real‑world test. Schedule a 30‑minute “dry run” where you play a mix of music, talk, and jingles while the encoder is live.
During the test, keep an eye on CPU usage. If you see spikes above 70 %, consider closing background applications or lowering the VBR ceiling. Latency should stay under 2 seconds; higher values can cause echo when you’re on a live call.
Packet loss is another red flag. LoovaCast’s dashboard shows a live packet loss graph – aim for less than 0.5 %. If you’re consistently higher, check your router’s QoS settings or upgrade to a fiber connection.
Analytics give you insight into listener behavior. The real‑time map shows where your audience is tuning in, while the bitrate stability chart reveals if you need to adjust your stream settings for specific regions.
Based on the data, make incremental tweaks. Increase the buffer size if listeners report occasional dropouts, or lower the bitrate for regions with limited bandwidth. Small adjustments often yield big improvements in perceived quality.
Remember, monitoring isn’t a one‑time task. Keep the LoovaCast analytics panel open for the first few hours after launch, then schedule a daily health check. Consistent vigilance turns a good online radio setup into a great one.

Going Live: Launch Checklist and Next Steps
The moment of truth arrives when you flip the “Go Live” switch. To make sure everything runs smoothly, run through this launch checklist step by step.
First, verify that the encoder settings – bitrate, sample rate, and normalization – match the specifications of your LoovaCast streaming plan. A mismatch can cause the platform to reject the stream or degrade audio quality.
Second, double‑check that your automation schedule is active. Play a short test of the playlist to confirm that songs, voice‑overs, and jingles fire exactly where you expect them to.
Third, test the backup stream. Simulate a primary server failure by disconnecting the main internet cable; the fail‑over should engage automatically and keep listeners on air.
Once the technical side is solid, fire off a launch announcement on your social channels. Use a teaser clip, a striking graphic, and a clear time‑zone reminder so fans know when to tune in.
- ☑ Encoder settings verified
- ☐ Automation scheduled
- ☐ Backup stream tested
- ☐ Launch announcement posted
- ☐ First‑hour monitoring plan ready
During the first hour, keep a close eye on the LoovaCast analytics panel. Note any unexpected spikes in latency or listener drop‑off, and be ready to adjust buffer sizes or bitrate on the fly.
After the launch, gather feedback from early listeners. Their comments on sound quality, stream stability, and content relevance will guide the next round of tweaks, turning your initial online radio setup into a polished, professional station.
Ready to launch your station? Get started with LoovaCast — your radio, your way.