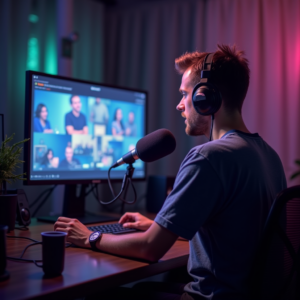
Breaking the Sound Barrier: Why Your Hardware Matters
When you start online radio, the first thing listeners notice is the sound. It’s the invisible handshake that tells them, “I’m in good hands.” A clean, balanced voice instantly builds trust, while crackle and hiss can make even the most compelling content feel unprofessional.
Many new broadcasters think they need a million‑dollar studio to sound credible. That myth falls apart the moment you understand the signal chain: your voice leaves the microphone, travels through a preamp or interface, passes a mixer (if you use one), and finally lands on LoovaCast’s streaming servers. Each link in that chain adds a tiny amount of color—or noise—so choosing solid hardware at every step is crucial.
Think of the chain like a relay race. If the baton (your audio) is dropped at any point, the audience feels the gap. By investing in a decent mic, a modest mixer or audio interface, and a set of headphones, you guarantee a smooth handoff every time you press “Go Live.” This foundation lets you focus on content instead of constantly fixing audio glitches.
In short, good hardware is the silent partner that lets you start online radio with confidence. It’s not about flash; it’s about consistency, clarity, and the professional vibe that keeps listeners coming back for more.
Choosing Your Voice: Dynamic vs. Condenser Microphones
Now that you understand why hardware matters, let’s talk about the heart of any broadcast: the microphone. The two main families you’ll encounter are dynamic and condenser mics, each with distinct strengths.
Dynamic Mics – The Home Broadcaster’s Best Friend
Dynamic microphones, such as the Shure SM58 or Audio‑Technica ATR2100, excel in untreated rooms. They use a moving‑coil design that is less sensitive to ambient noise, making them perfect for bedrooms, living rooms, or even a kitchen table. Because they don’t require phantom power, you can plug them straight into a USB interface or a small mixer.
These mics also handle high sound pressure levels without distortion, so if you tend to speak passionately (or shout a little when you get excited), they’ll stay clear. For most people who start online radio from home, a dynamic mic gives you professional‑grade sound without the need for acoustic treatment.
Condenser Mics – When You Want Studio‑Level Detail
Condenser microphones, like the Rode NT‑USB or the AKG C214, capture a broader frequency range and more subtle nuances. They shine in quiet environments—think a sound‑treated closet or a dedicated home studio. Because they rely on a built‑in capacitor, they need phantom power (48 V) from an audio interface or mixer.
If your show includes voice‑overs, narration, or music commentary where every breath matters, a condenser can give you that polished polish. However, they also pick up room reflections, so you’ll need a modest acoustic treatment or a very quiet space to truly benefit.
USB vs. XLR – Plug‑and‑Play vs. Scalable
USB microphones bundle a built‑in preamp and A/D converter, letting you connect directly to your computer. They’re the fastest way to start online radio because there’s no extra gear to set up. XLR mics, on the other hand, require an interface or mixer, but they open the door to future upgrades—multiple channels, better preamps, and more routing flexibility.
Choosing between them depends on your current needs and long‑term plans. If you’re testing the waters, a USB mic is low‑cost and simple. If you envision expanding to guest interviews, live music, or multiple hosts, investing in an XLR mic and a small audio interface will pay off.
- A) Dedicated quiet room
- B) Bedroom/Home office
- C) Living room with kids/pets
- D) On‑the‑go/Mobile
Share your answer in the comments!
The Nerve Center: Finding the Right Mixer for Your Flow
Whether you’re solo or planning to host guests, a mixer (or audio interface) is the command hub that lets you balance voice, music, and effects. For beginners, the biggest mistake is chasing a massive board loaded with features you’ll never use.
Analog vs. Digital – Comfort Meets Capability
Analog mixers give you tactile, hands‑on control. Turning a physical knob feels immediate, and the signal path is straightforward. They’re great if you prefer “feel” over menus. Digital mixers, like the Behringer X‑AIR or Zoom LiveTrak, offer recallable scenes, built‑in effects, and USB connectivity, but they come with a learning curve.
If you’re just starting online radio, an analog 2‑ or 4‑channel mixer (or a USB audio interface with a few inputs) is often enough. You’ll get clear gain knobs, a simple EQ, and the ability to add a microphone and a line‑in for music without overwhelming yourself.
Essential Features – Faders, Gain, and Phantom Power
Every channel should have a gain knob (or trim) to set the input level before it hits the fader. Adjust the gain so your voice peaks around -12 dB on the meter—this leaves headroom and avoids clipping. The fader controls the output level sent to LoovaCast.
If you opt for a condenser mic, make sure the mixer or interface provides phantom power. Look for a “+48 V” switch on each channel, and remember to turn it on only when a phantom‑powered mic is connected.
EQ is optional for beginners, but a simple high‑pass filter can cut low‑frequency rumble from floor vibrations, making your voice sound cleaner.
The ‘Silent’ Heroes: Essential Accessories You Can’t Ignore
Even the best mic and mixer can sound rough without the right accessories. Think of these items as the backstage crew that keeps the show running smoothly.
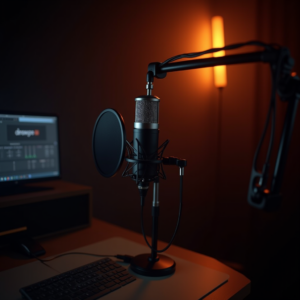
Pop Filters and Windscreens – Taming the “P‑Pop”
When you say words like “pop” or “perfect,” a burst of air hits the mic diaphragm, creating an unwanted “p‑pop.” A mesh pop filter placed 2–4 inches from the mic diffuses this airflow, delivering smoother consonants. For outdoor or on‑the‑go recordings, a simple foam windscreen works well too.
Closed‑Back Headphones – Your Real‑Time Monitor
Open‑back headphones sound spacious but leak sound into the mic, creating feedback loops. Closed‑back headphones, such as the Audio‑Technica ATH‑M50x, isolate you from ambient noise and let you hear exactly what LoovaCast is broadcasting. This is essential for catching clipping, background hum, or unintended noises before they go live.
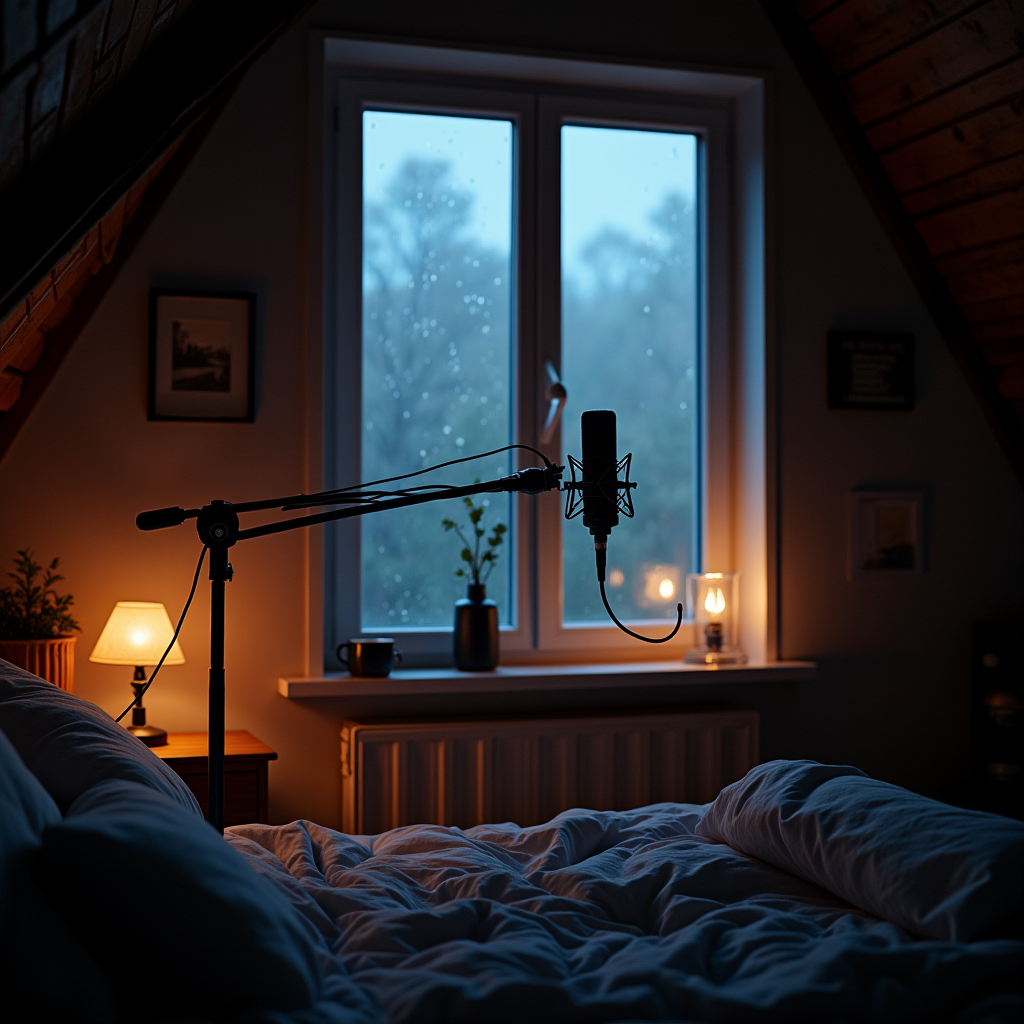
Boom Arms and Stands – Positioning for Resonance
A sturdy boom arm lets you position the mic at the perfect height and angle without desk clutter. It also isolates the mic from vibrations caused by typing or desk bumps. If space is limited, a desktop stand with a shock‑mount can be a budget‑friendly alternative.
- ☑ Mic tested and levels set
- ☑ Headphones plugged in
- ☑ Pop filter positioned 2‑4 inches from mic
- ☑ Cables secured and tangle‑free
- ☑ LoovaCast dashboard open and ready

Budgeting Your Build: Three Tiers of Setup
Not everyone has the same budget, and that’s okay. Below are three tiered setups that let you start online radio at a price point that feels right for you.
Starter Kit – Low‑Cost USB Solutions
Perfect for hobbyists or those testing the waters. A USB mic like the Fifine K670 (≈ $40) paired with a set of closed‑back headphones (≈ $30) gives you a plug‑and‑play experience. Add a pop filter (≈ $15) and you’re ready to stream from your laptop directly into LoovaCast.
This setup keeps your total under $100, and all you need is a computer and a quiet corner. The audio quality is more than enough for a first episode, and you can upgrade later without re‑learning the workflow.
Prosumer Path – XLR Mic + Small Interface
If you want a step up, invest in a dynamic XLR mic such as the Shure SM58 (≈ $100) and a 2‑input USB audio interface like the Focusrite Scarlett 2i2 (≈ $150). This combo delivers cleaner preamps, phantom power for future condenser upgrades, and the flexibility to add a line‑in for music.
Pair it with a decent headphone (≈ $80) and a sturdy boom arm (≈ $50). Total cost hovers around $380, giving you a professional‑grade signal chain while still being portable enough for a home office.
Broadcast‑Ready Rig – High‑End Gear
For stations that plan to scale quickly, a small analog mixer (e.g., Mackie 402VLZ4, ≈ $200) plus a premium condenser mic like the Rode NT1‑A (≈ $230) and a high‑resolution audio interface (≈ $300) create a studio‑grade environment.
Add a pair of reference headphones (≈ $150), a premium boom arm with internal shock‑mount (≈ $120), and a rack‑mountable power conditioner (≈ $100). This setup can exceed $1,200, but it offers the headroom and reliability needed for a full‑time broadcast schedule.
No matter which tier you choose, the key is to start simple, test your sound, and upgrade as your audience grows. The modular nature of these components means you can swap parts without overhauling the entire system.
From Plug‑in to On‑Air: Your Final Sound Check
Now that your gear is assembled, it’s time for the moment of truth: the sound check. Follow these steps to ensure your broadcast sounds as crisp as you imagined.
Set Gain Levels – Avoid Clipping
Speak into the mic at your normal broadcast volume. Watch the input meter on LoovaCast or your interface; the peaks should hover around -12 dB to -6 dB. If the meter flashes red, lower the gain knob until the peaks stay in the green zone. This prevents digital clipping, which sounds harsh and unprofessional.
Test Latency – Keep Voice and Music in Sync
Play a short music clip on your computer while you talk over it. Listen for any noticeable delay between your voice and the music. If latency exceeds 150 ms, adjust the buffer size in your audio driver settings (lower for less delay, higher for stability). Most modern computers can handle a 256‑sample buffer without glitches.
Final Walkthrough – Connect to LoovaCast
1. Plug the XLR or USB mic into your interface or mixer.
2. Connect the interface’s USB cable to your computer.
3. Open the LoovaCast dashboard and select the audio device under “Input Settings.”
4. Enable “Monitor” to hear yourself through headphones, ensuring there’s no feedback.
5. Hit the “Test” button, speak a few sentences, and verify that the waveform appears in the visualizer.
When everything looks good, hit the “Start Broadcast” button. Keep an eye on the level meters for the first few minutes; small adjustments are normal as you settle into your speaking rhythm.
Congratulations! You now have a solid hardware foundation, a clear checklist, and the confidence to start online radio with a professional sound. Remember, the best equipment is only as good as the care you put into it, so keep testing, tweaking, and listening.
Ready to launch your station? Get started with LoovaCast — your radio, your way.